type
status
date
slug
summary
tags
category
icon
password
简要介绍了通过 Cloudflare 创建隧道来提供 Deepseek-R1 的 API,需要提前准备 Cloudflare 账户和一个域名。
一、创建高性能工作空间
- 创建 Cloud Studio 账户
在以下网址 ide.cloud.tencent.com 中创建Cloud Studio 账户。
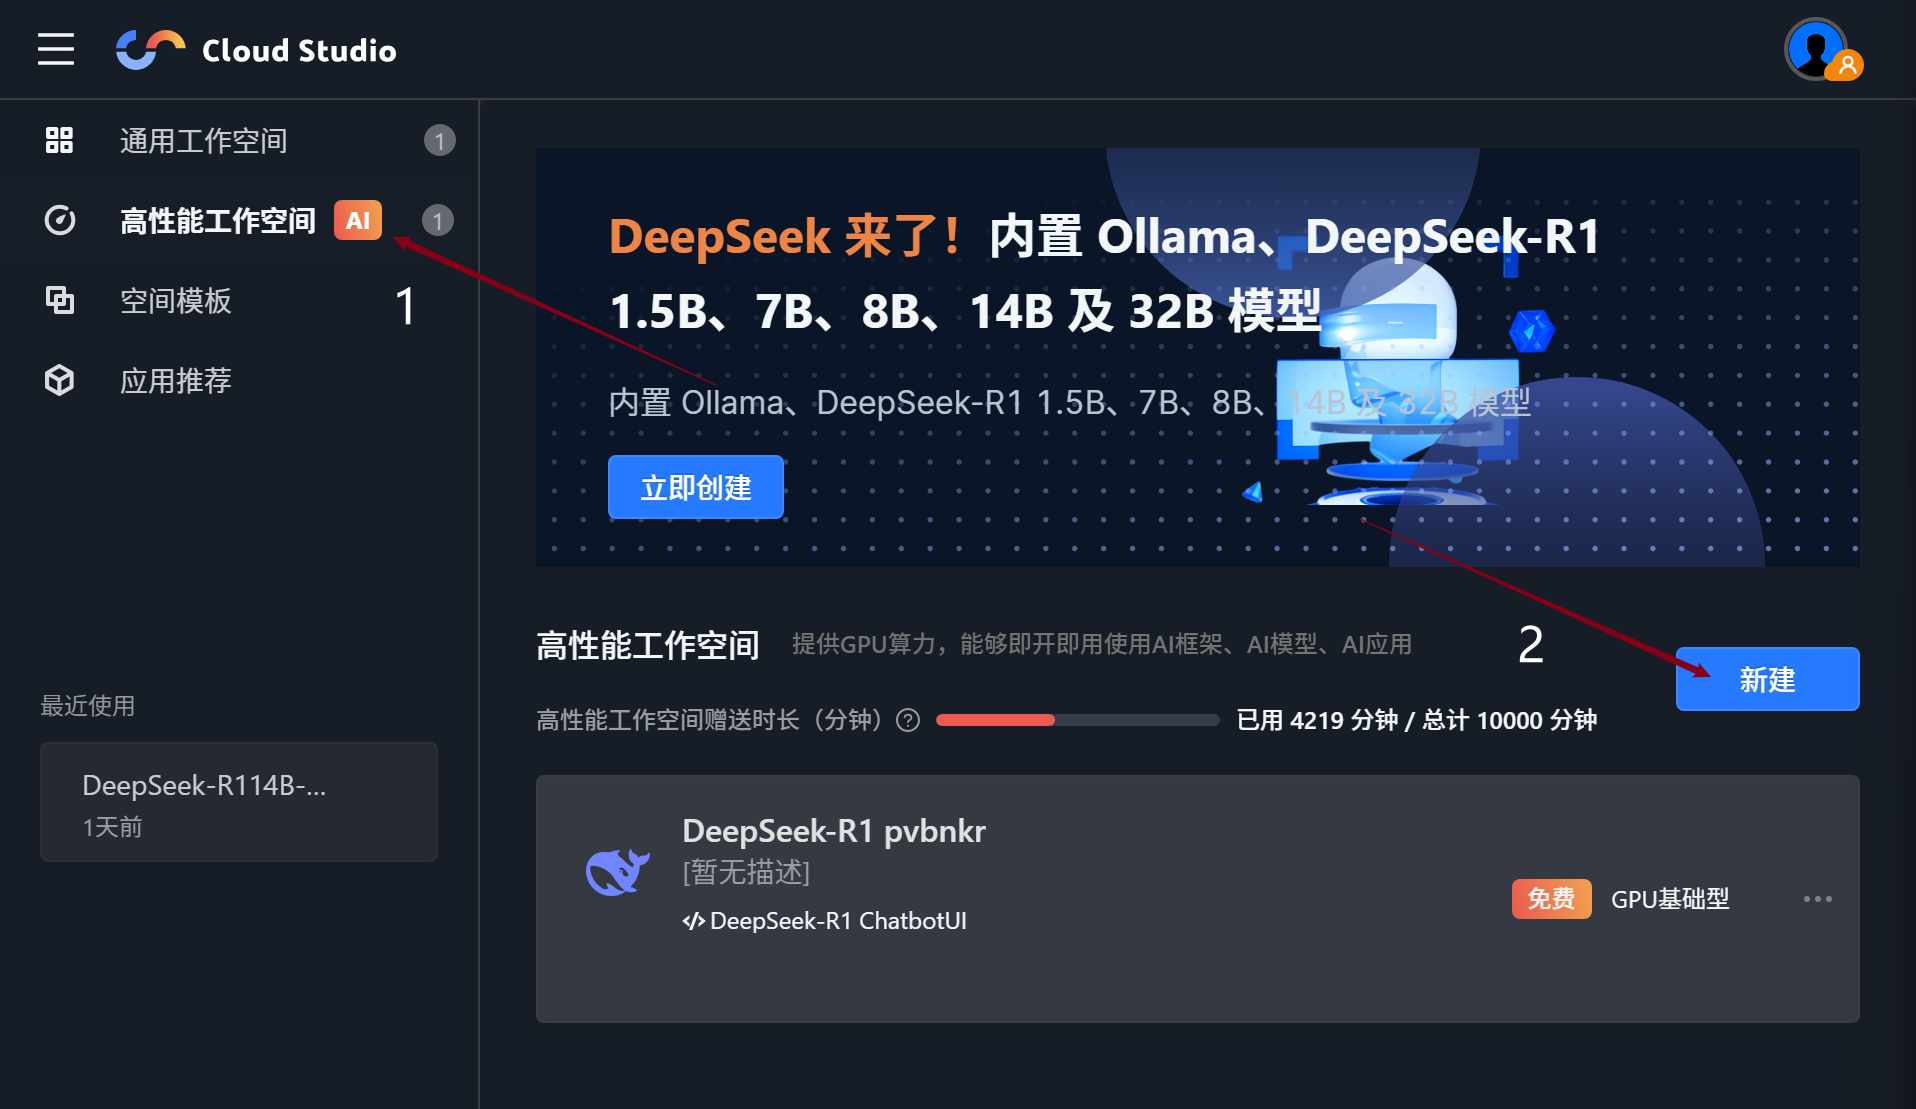
- 点击高性能工作空间,点击新建。
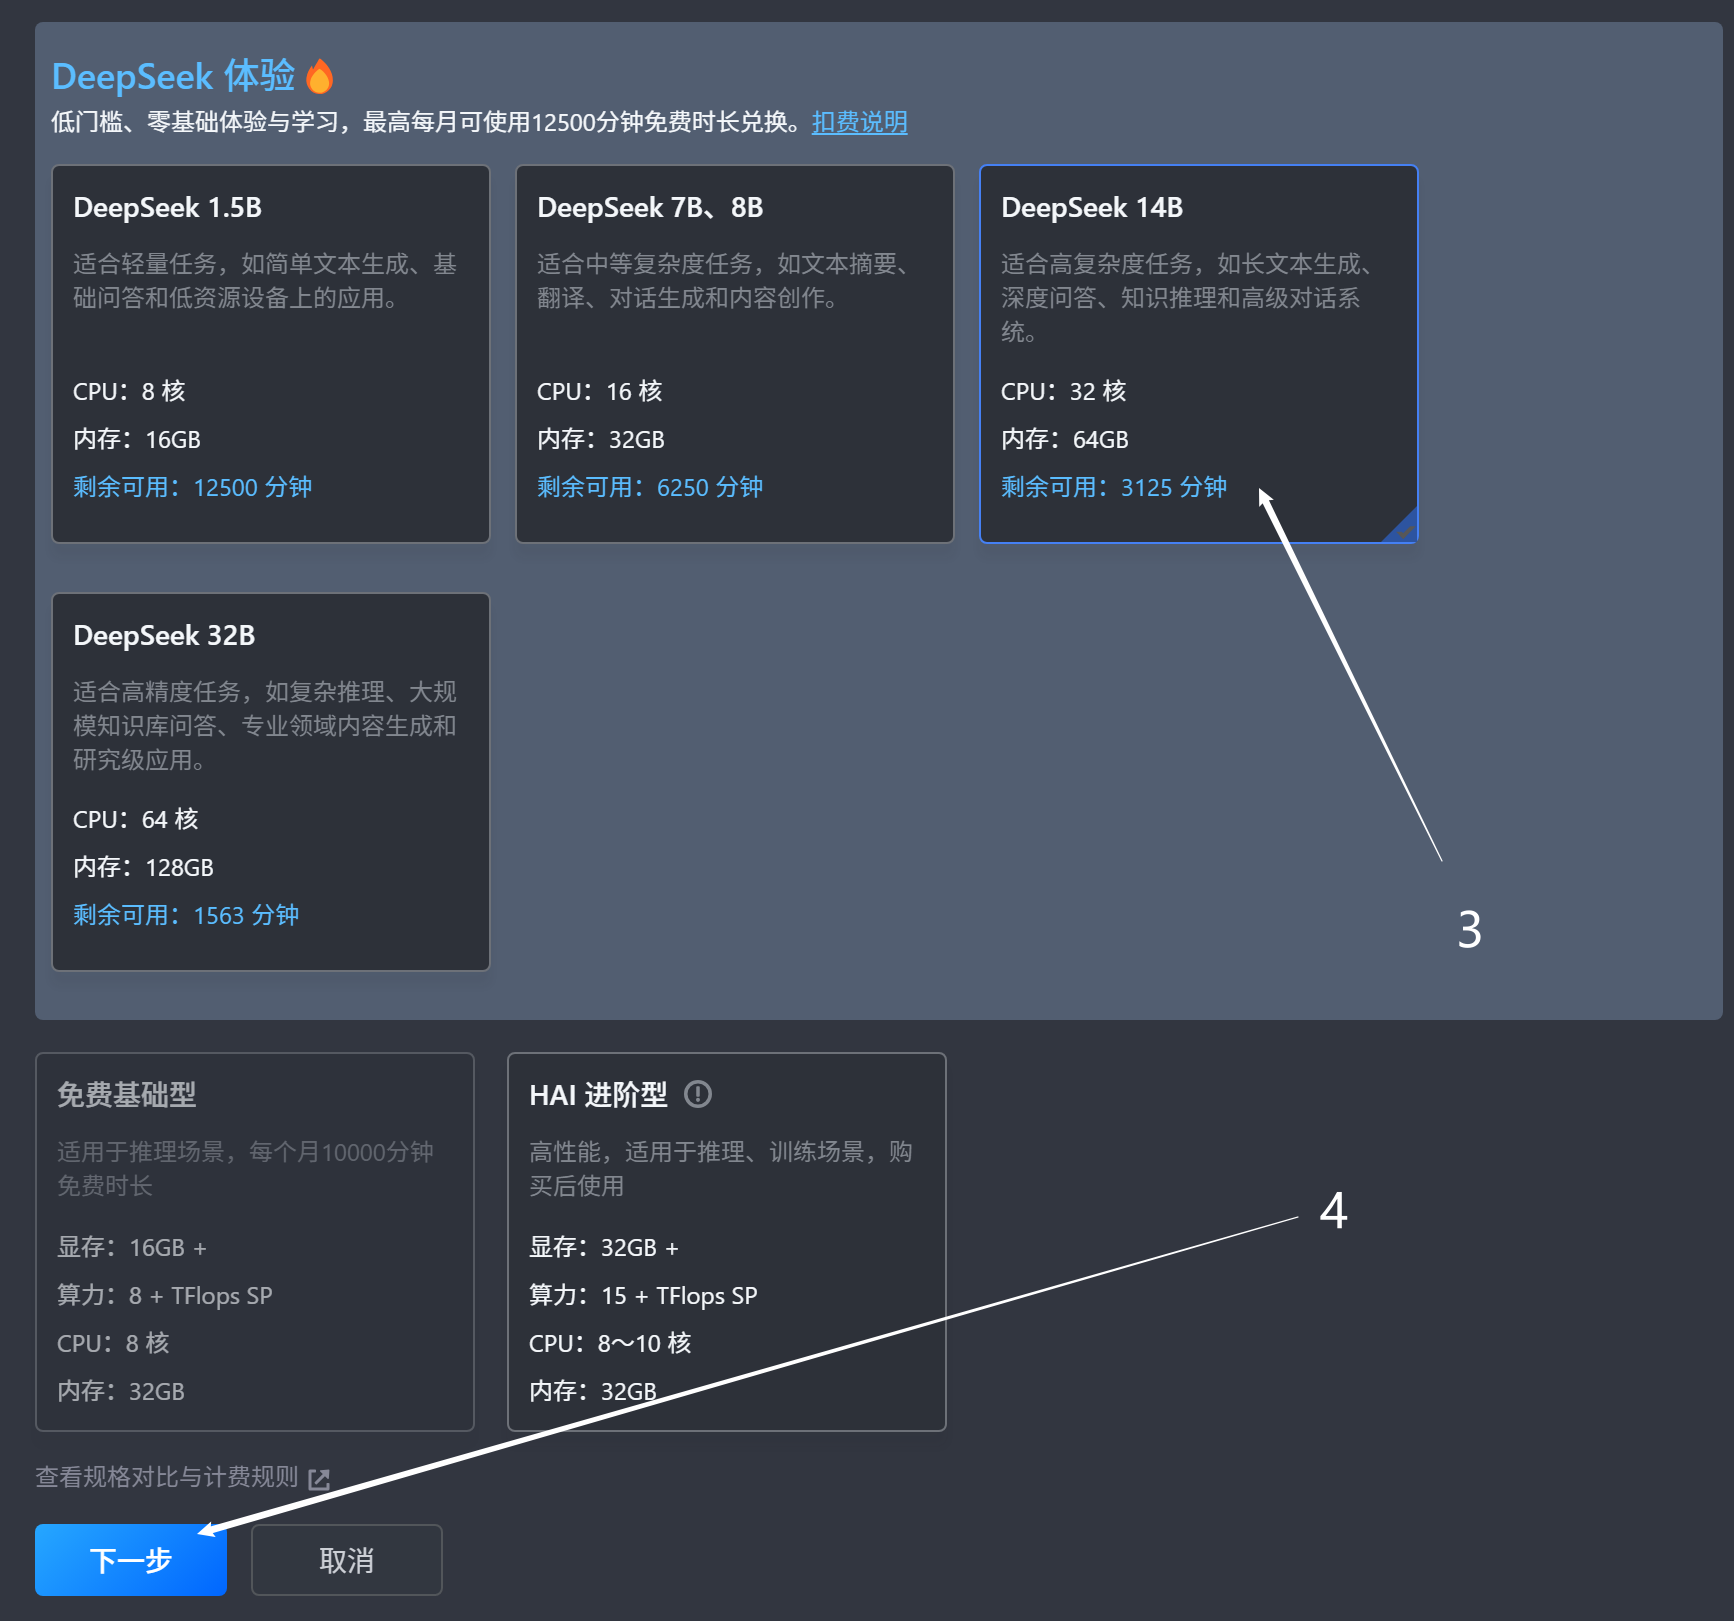
- 选择空间规格,目前HAI进阶型需要付费,其他的消耗免费时长,然后点击下一步
此时会打开类似 VS Code 的界面,此时注意浏览器中的 这个提示 http://localhost:8434,下面会用到这个值。
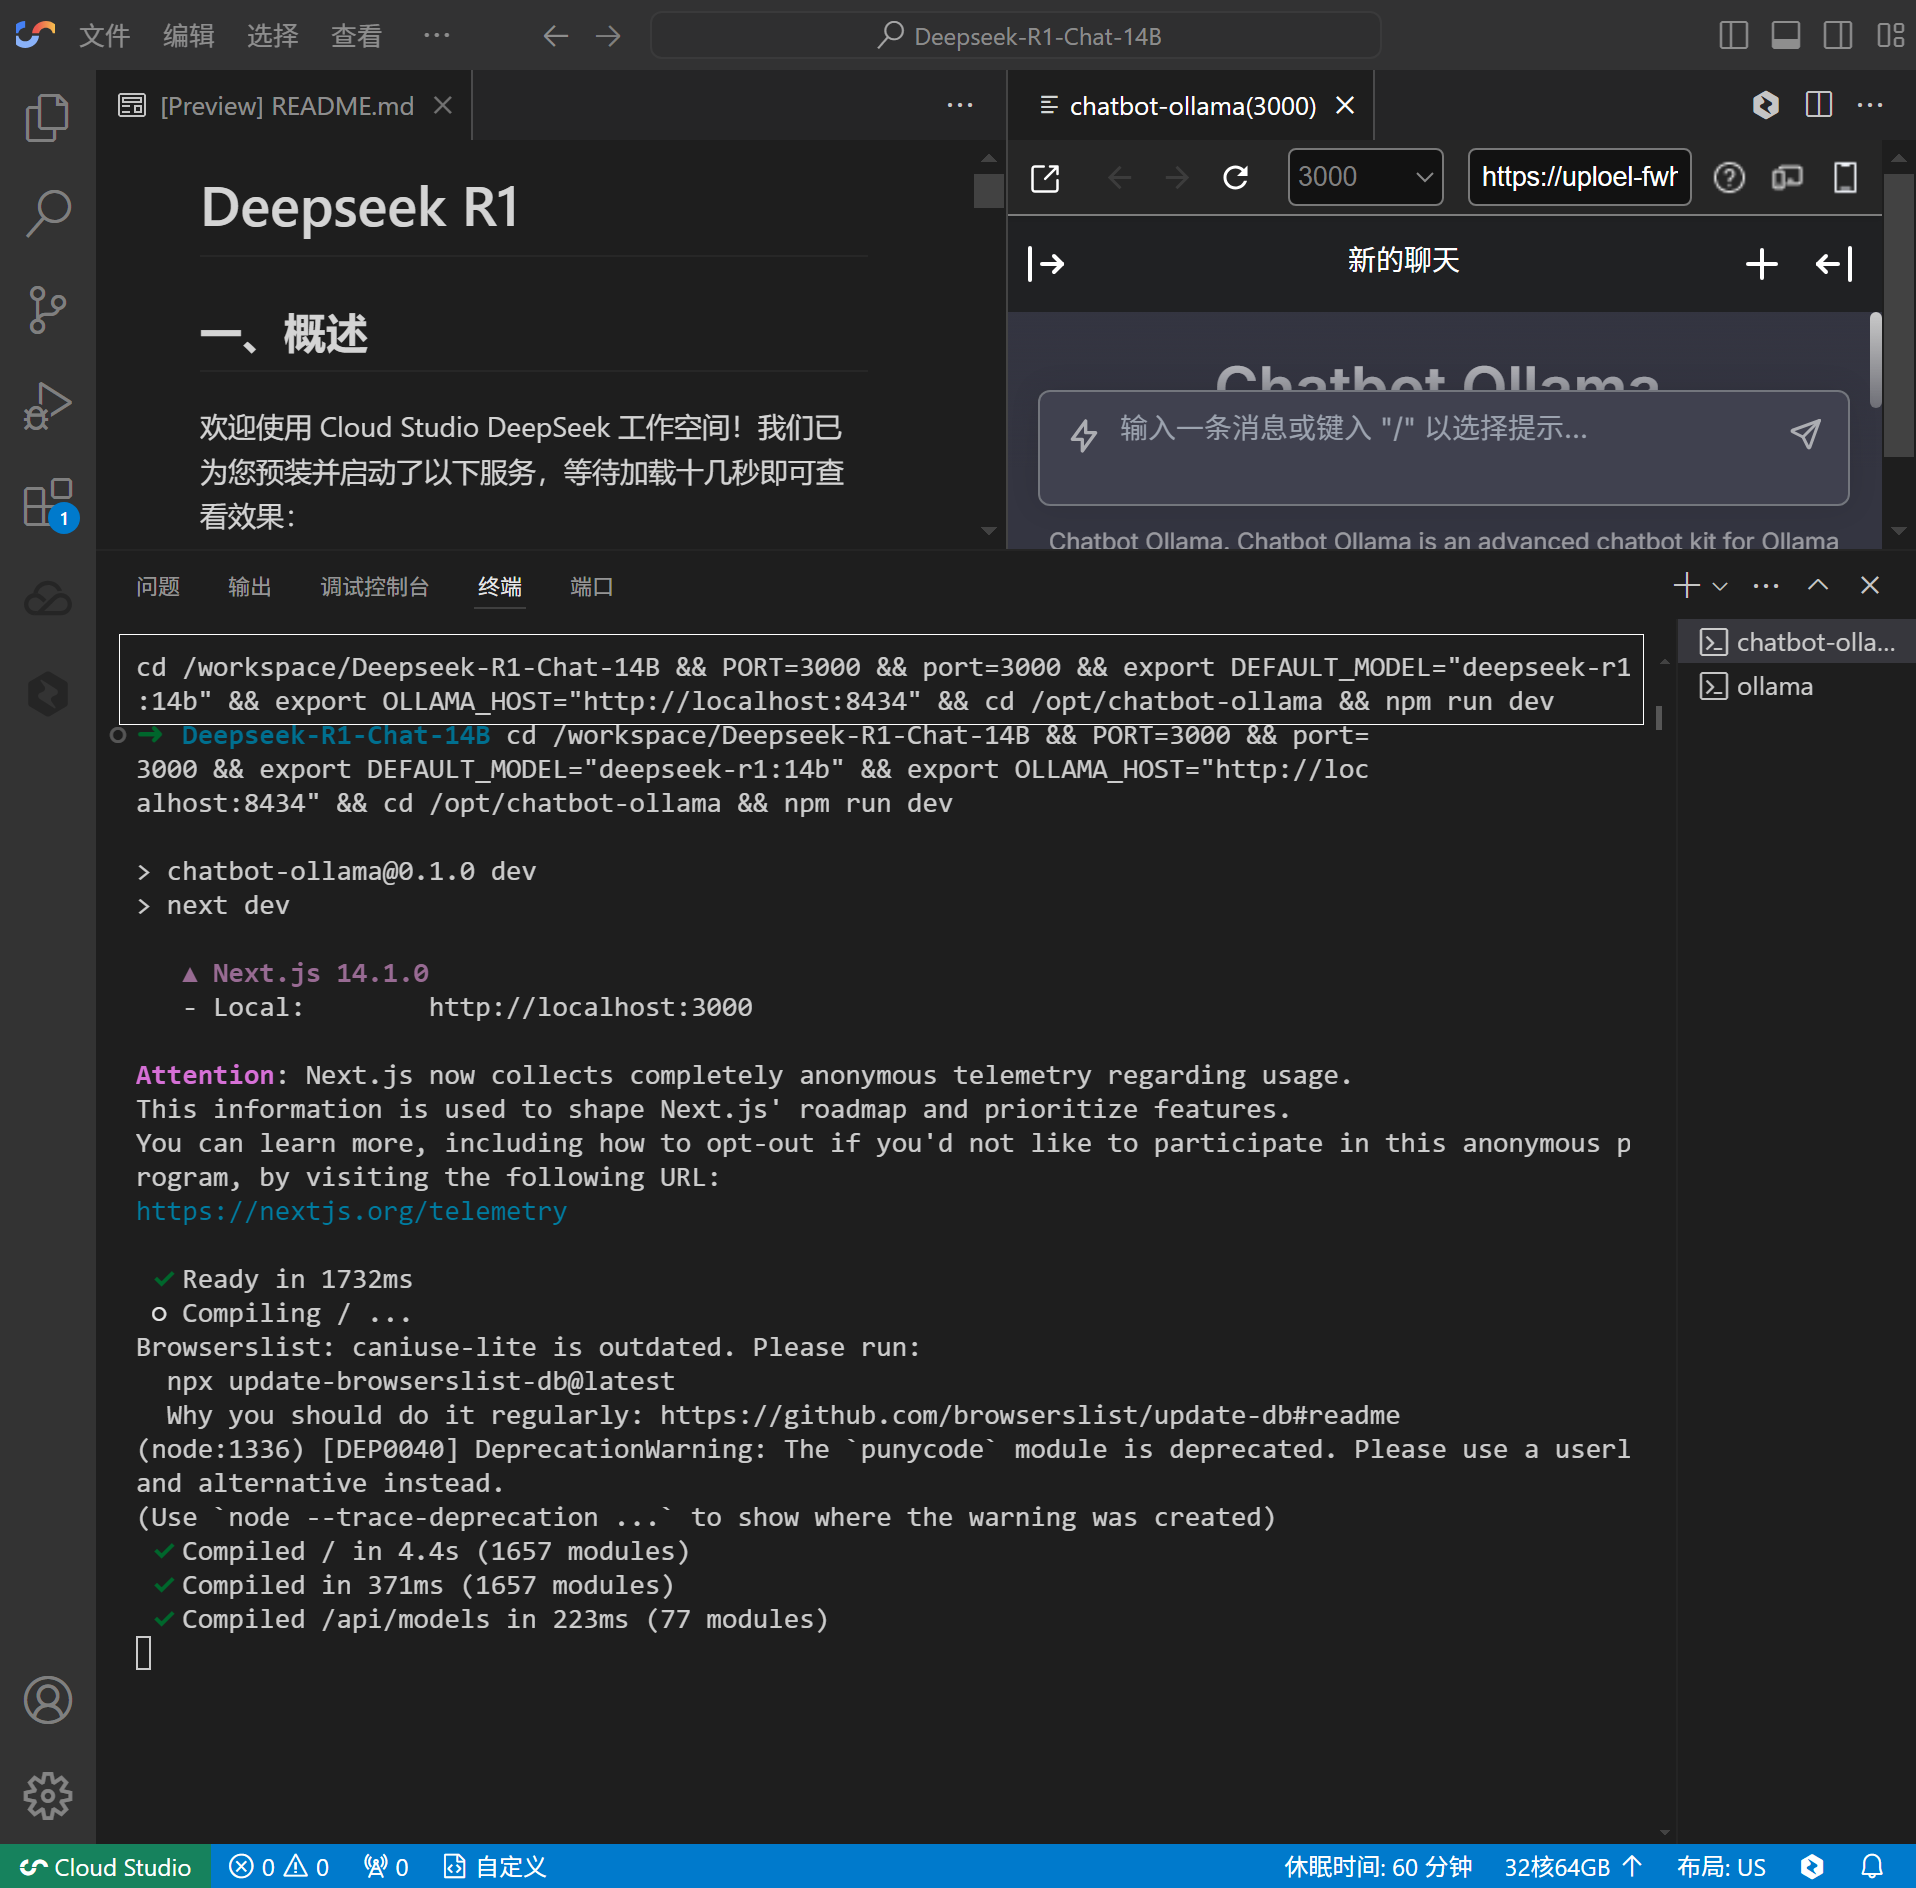
若没有,直接终端中执行
输出类似 http://0.0.0.0:6399 的值也能找到。重新打开浏览器窗口然后打开Cloudflare。
二、Cloudflare 隧道。
- 打开 https://dash.cloudflare.com/ 点击Zero Trust。
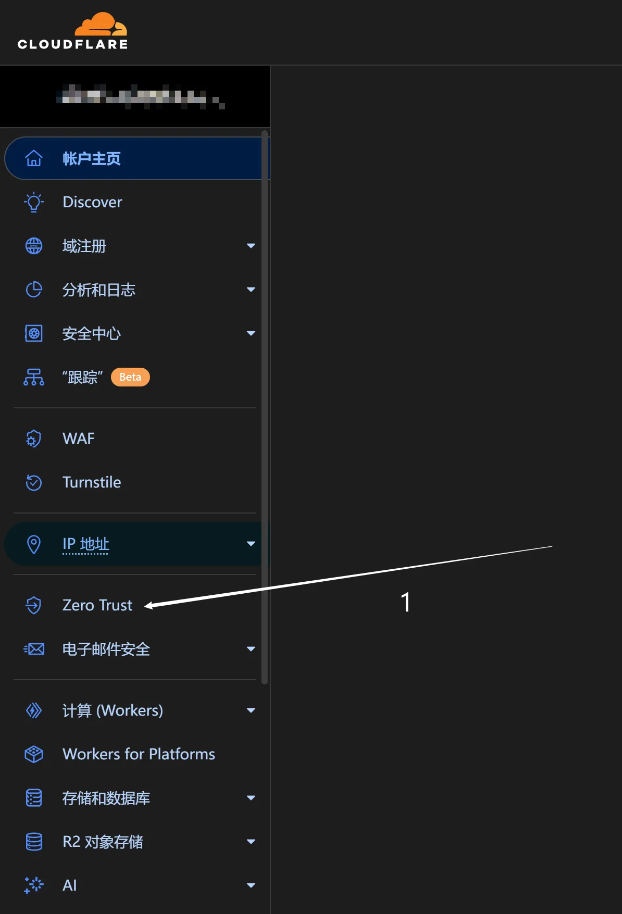
2、点击网络中的 Tunnels.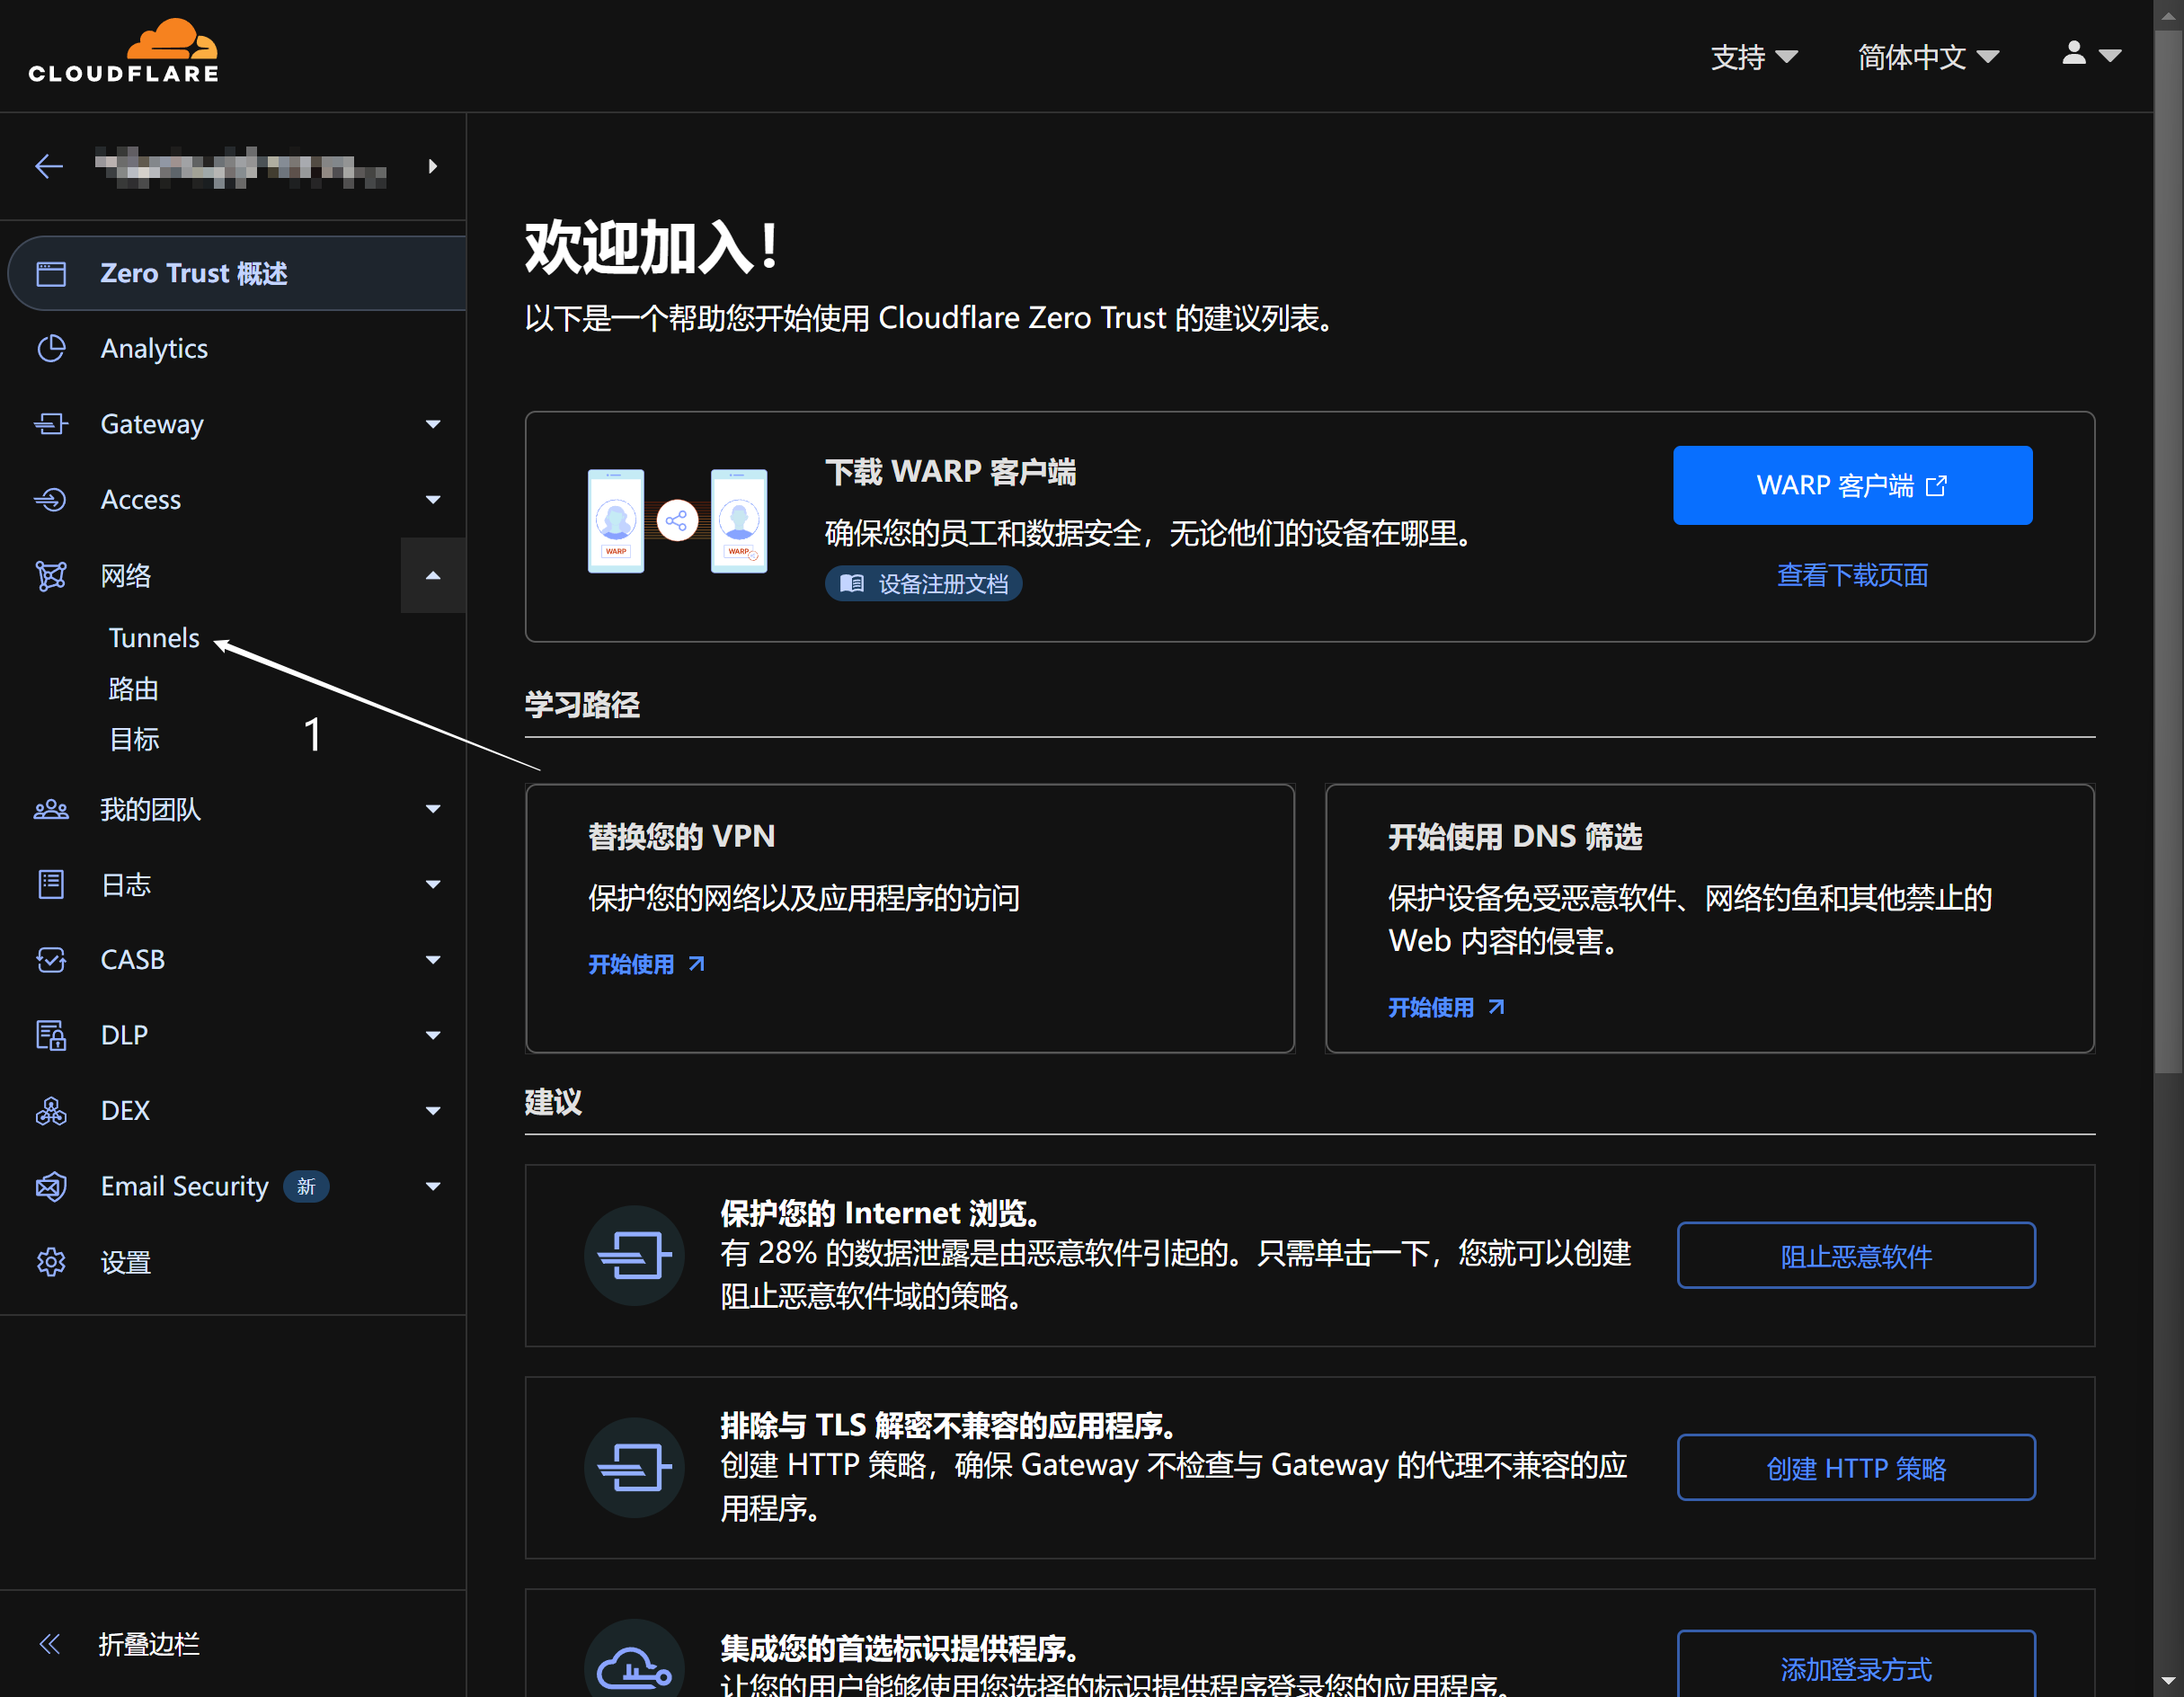

3、点击添加隧道。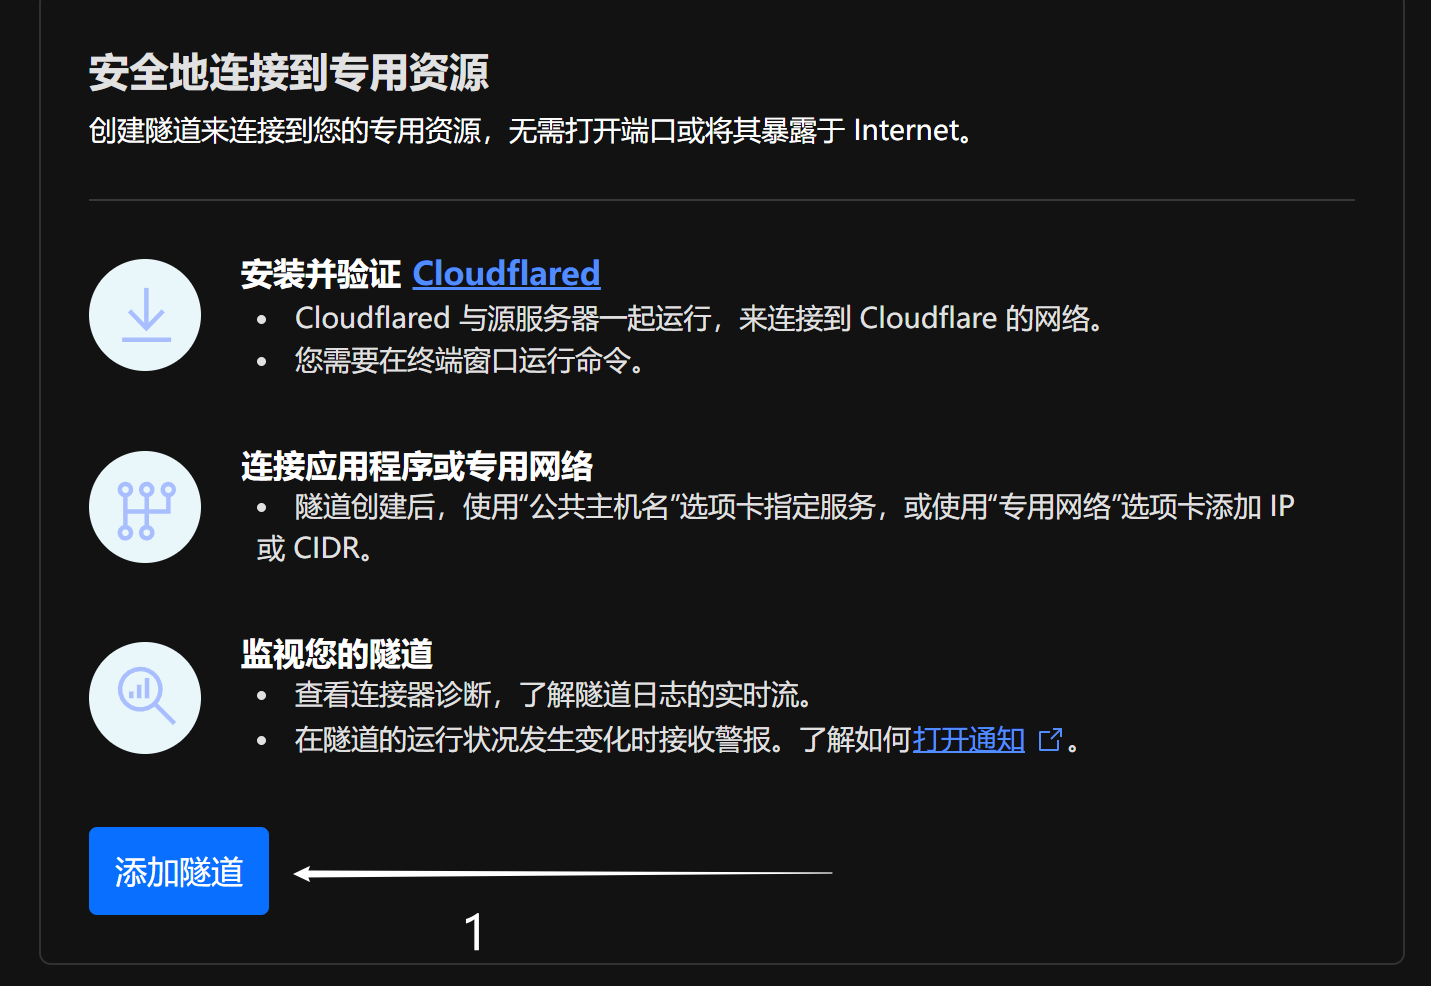

4、选择Cloudflared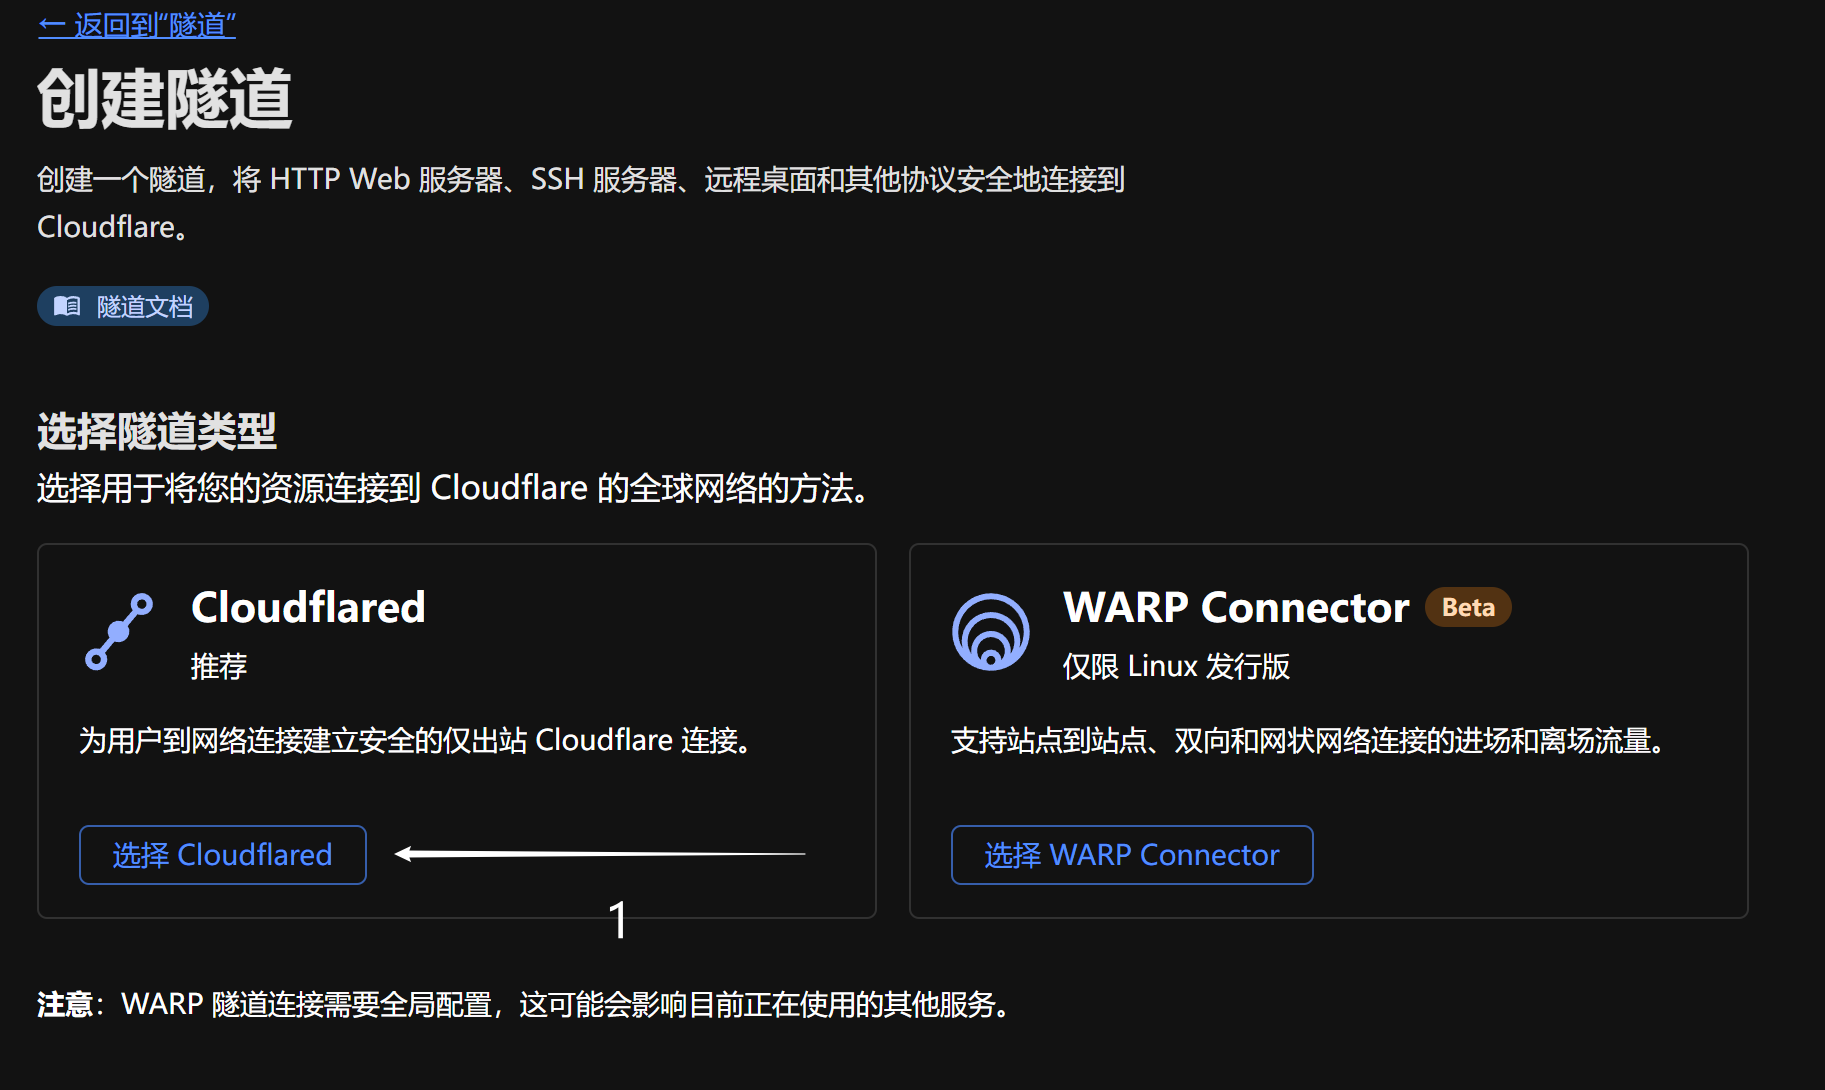

5、为隧道命名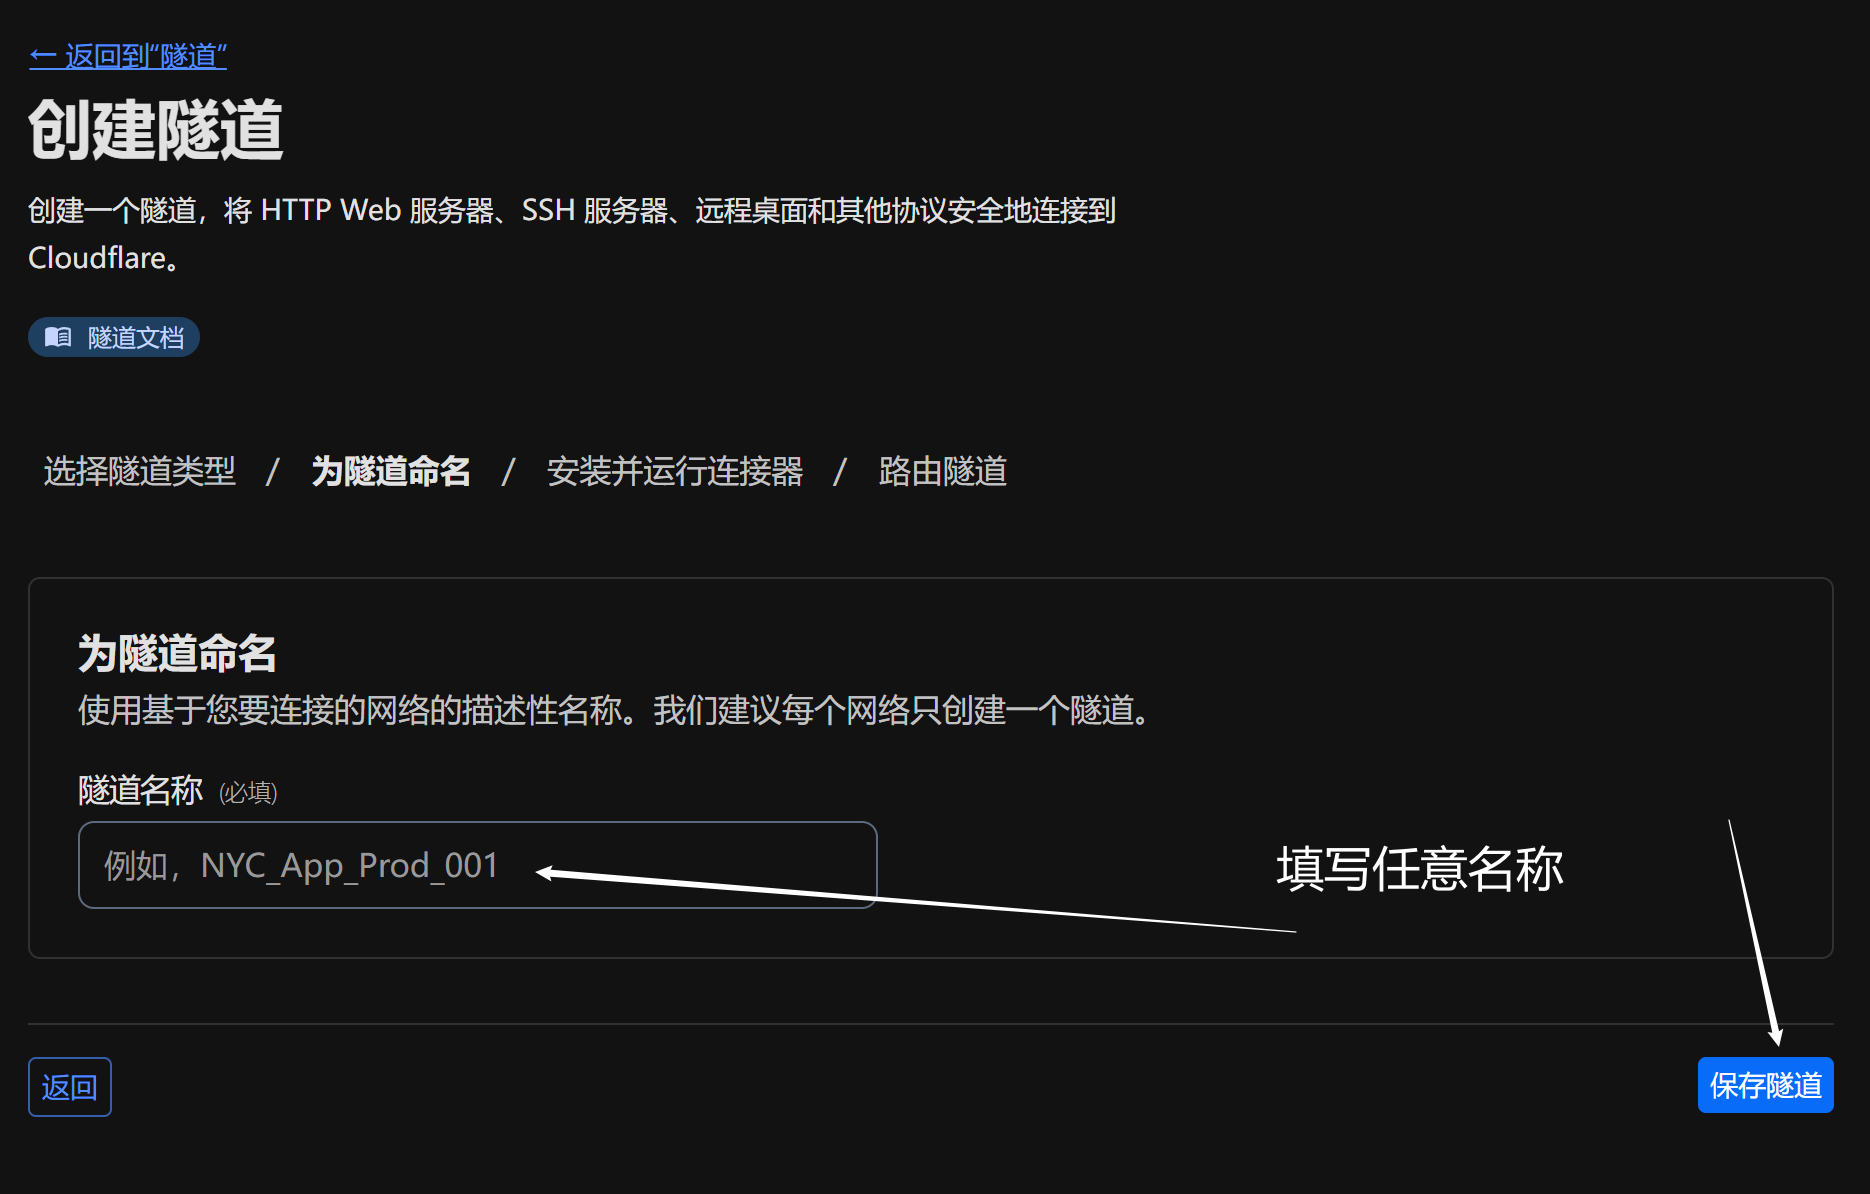

6、安装并运行连接器。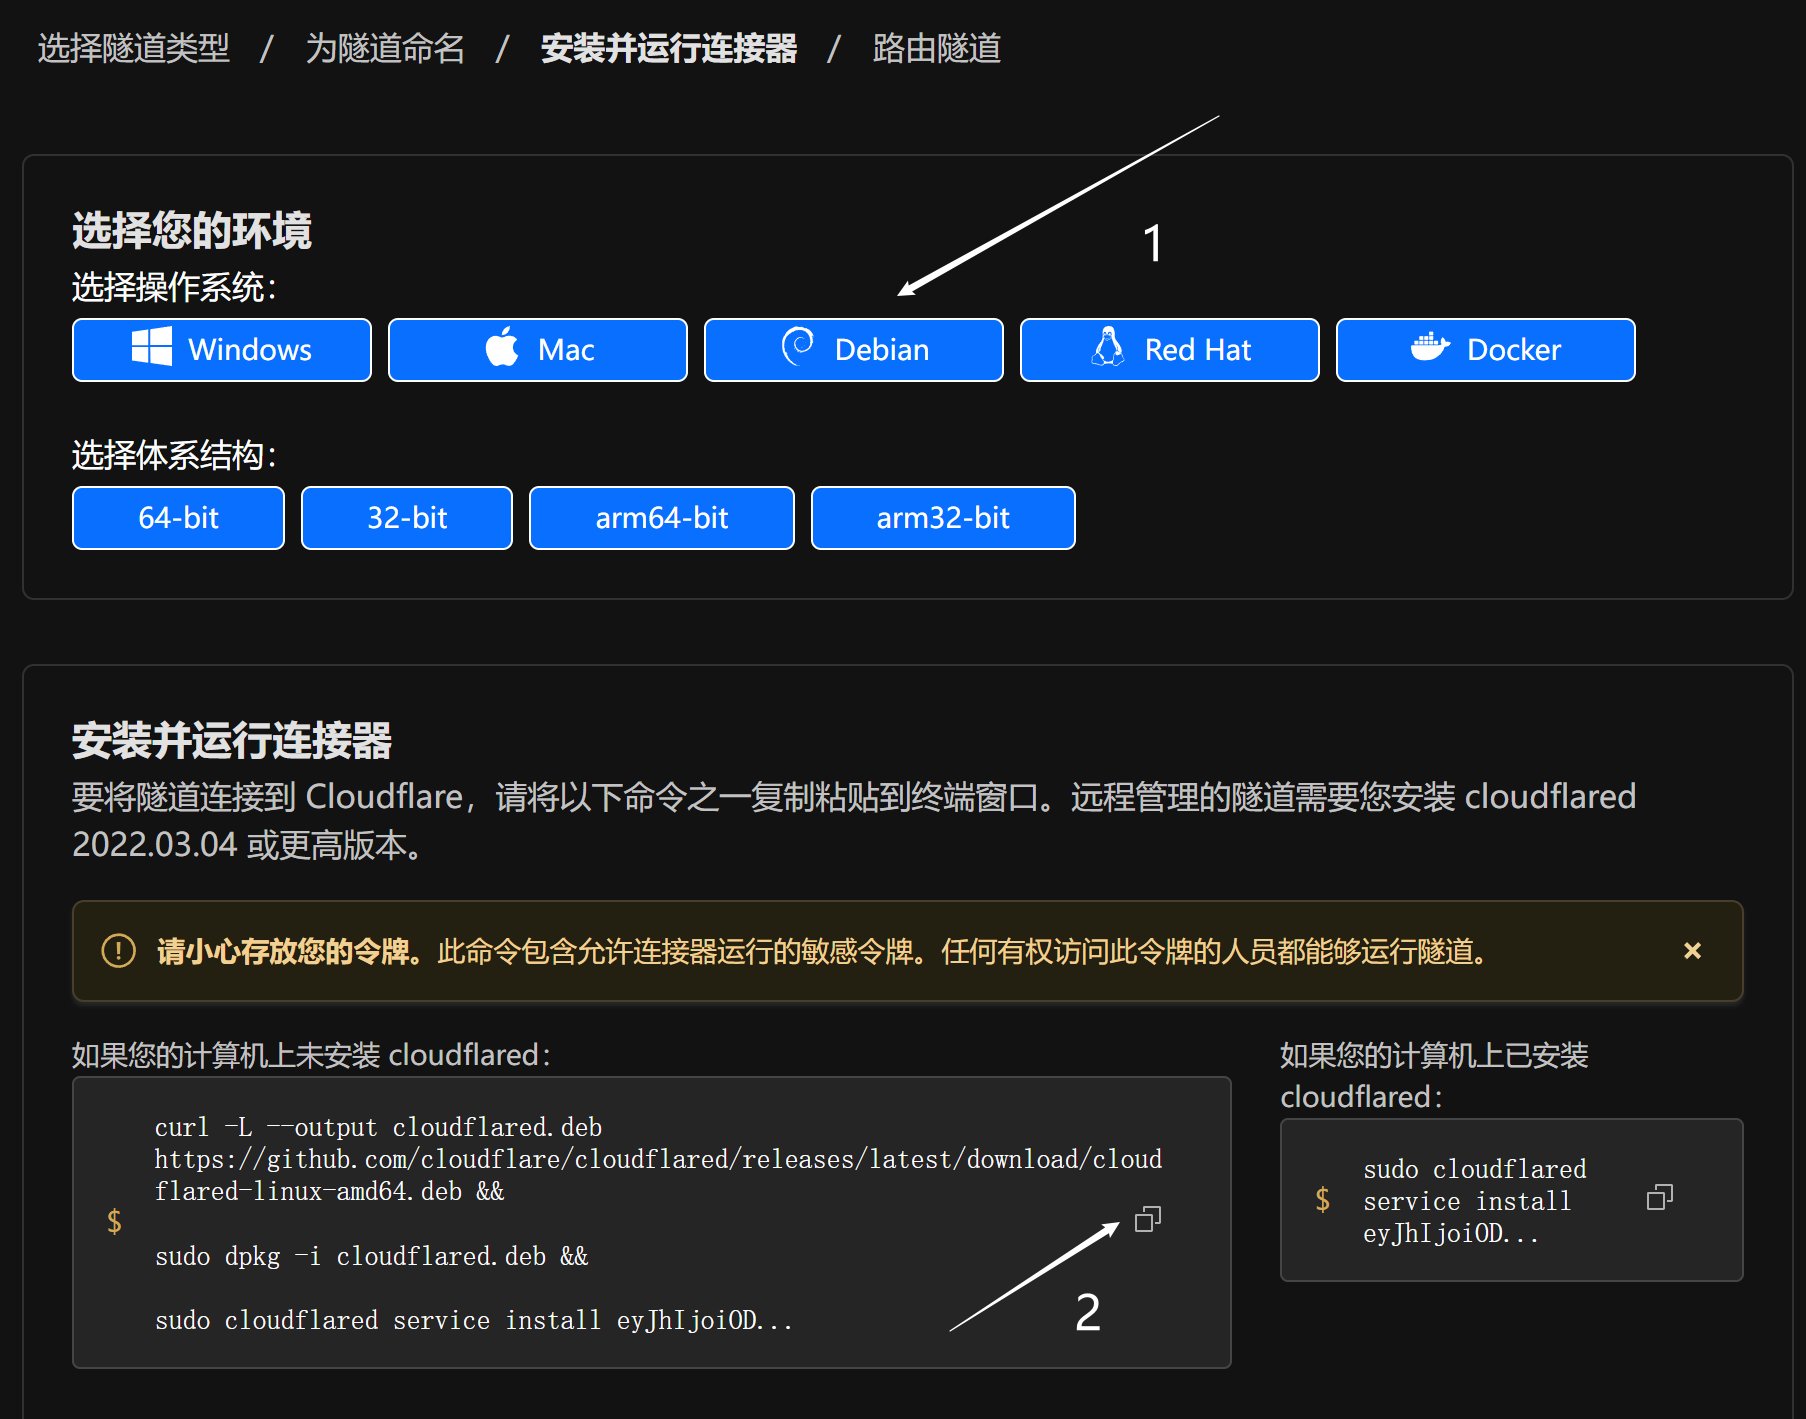
选择Debian,然后点击2处的复制按钮。

7、安装 cloudflared 并创建隧道服务。
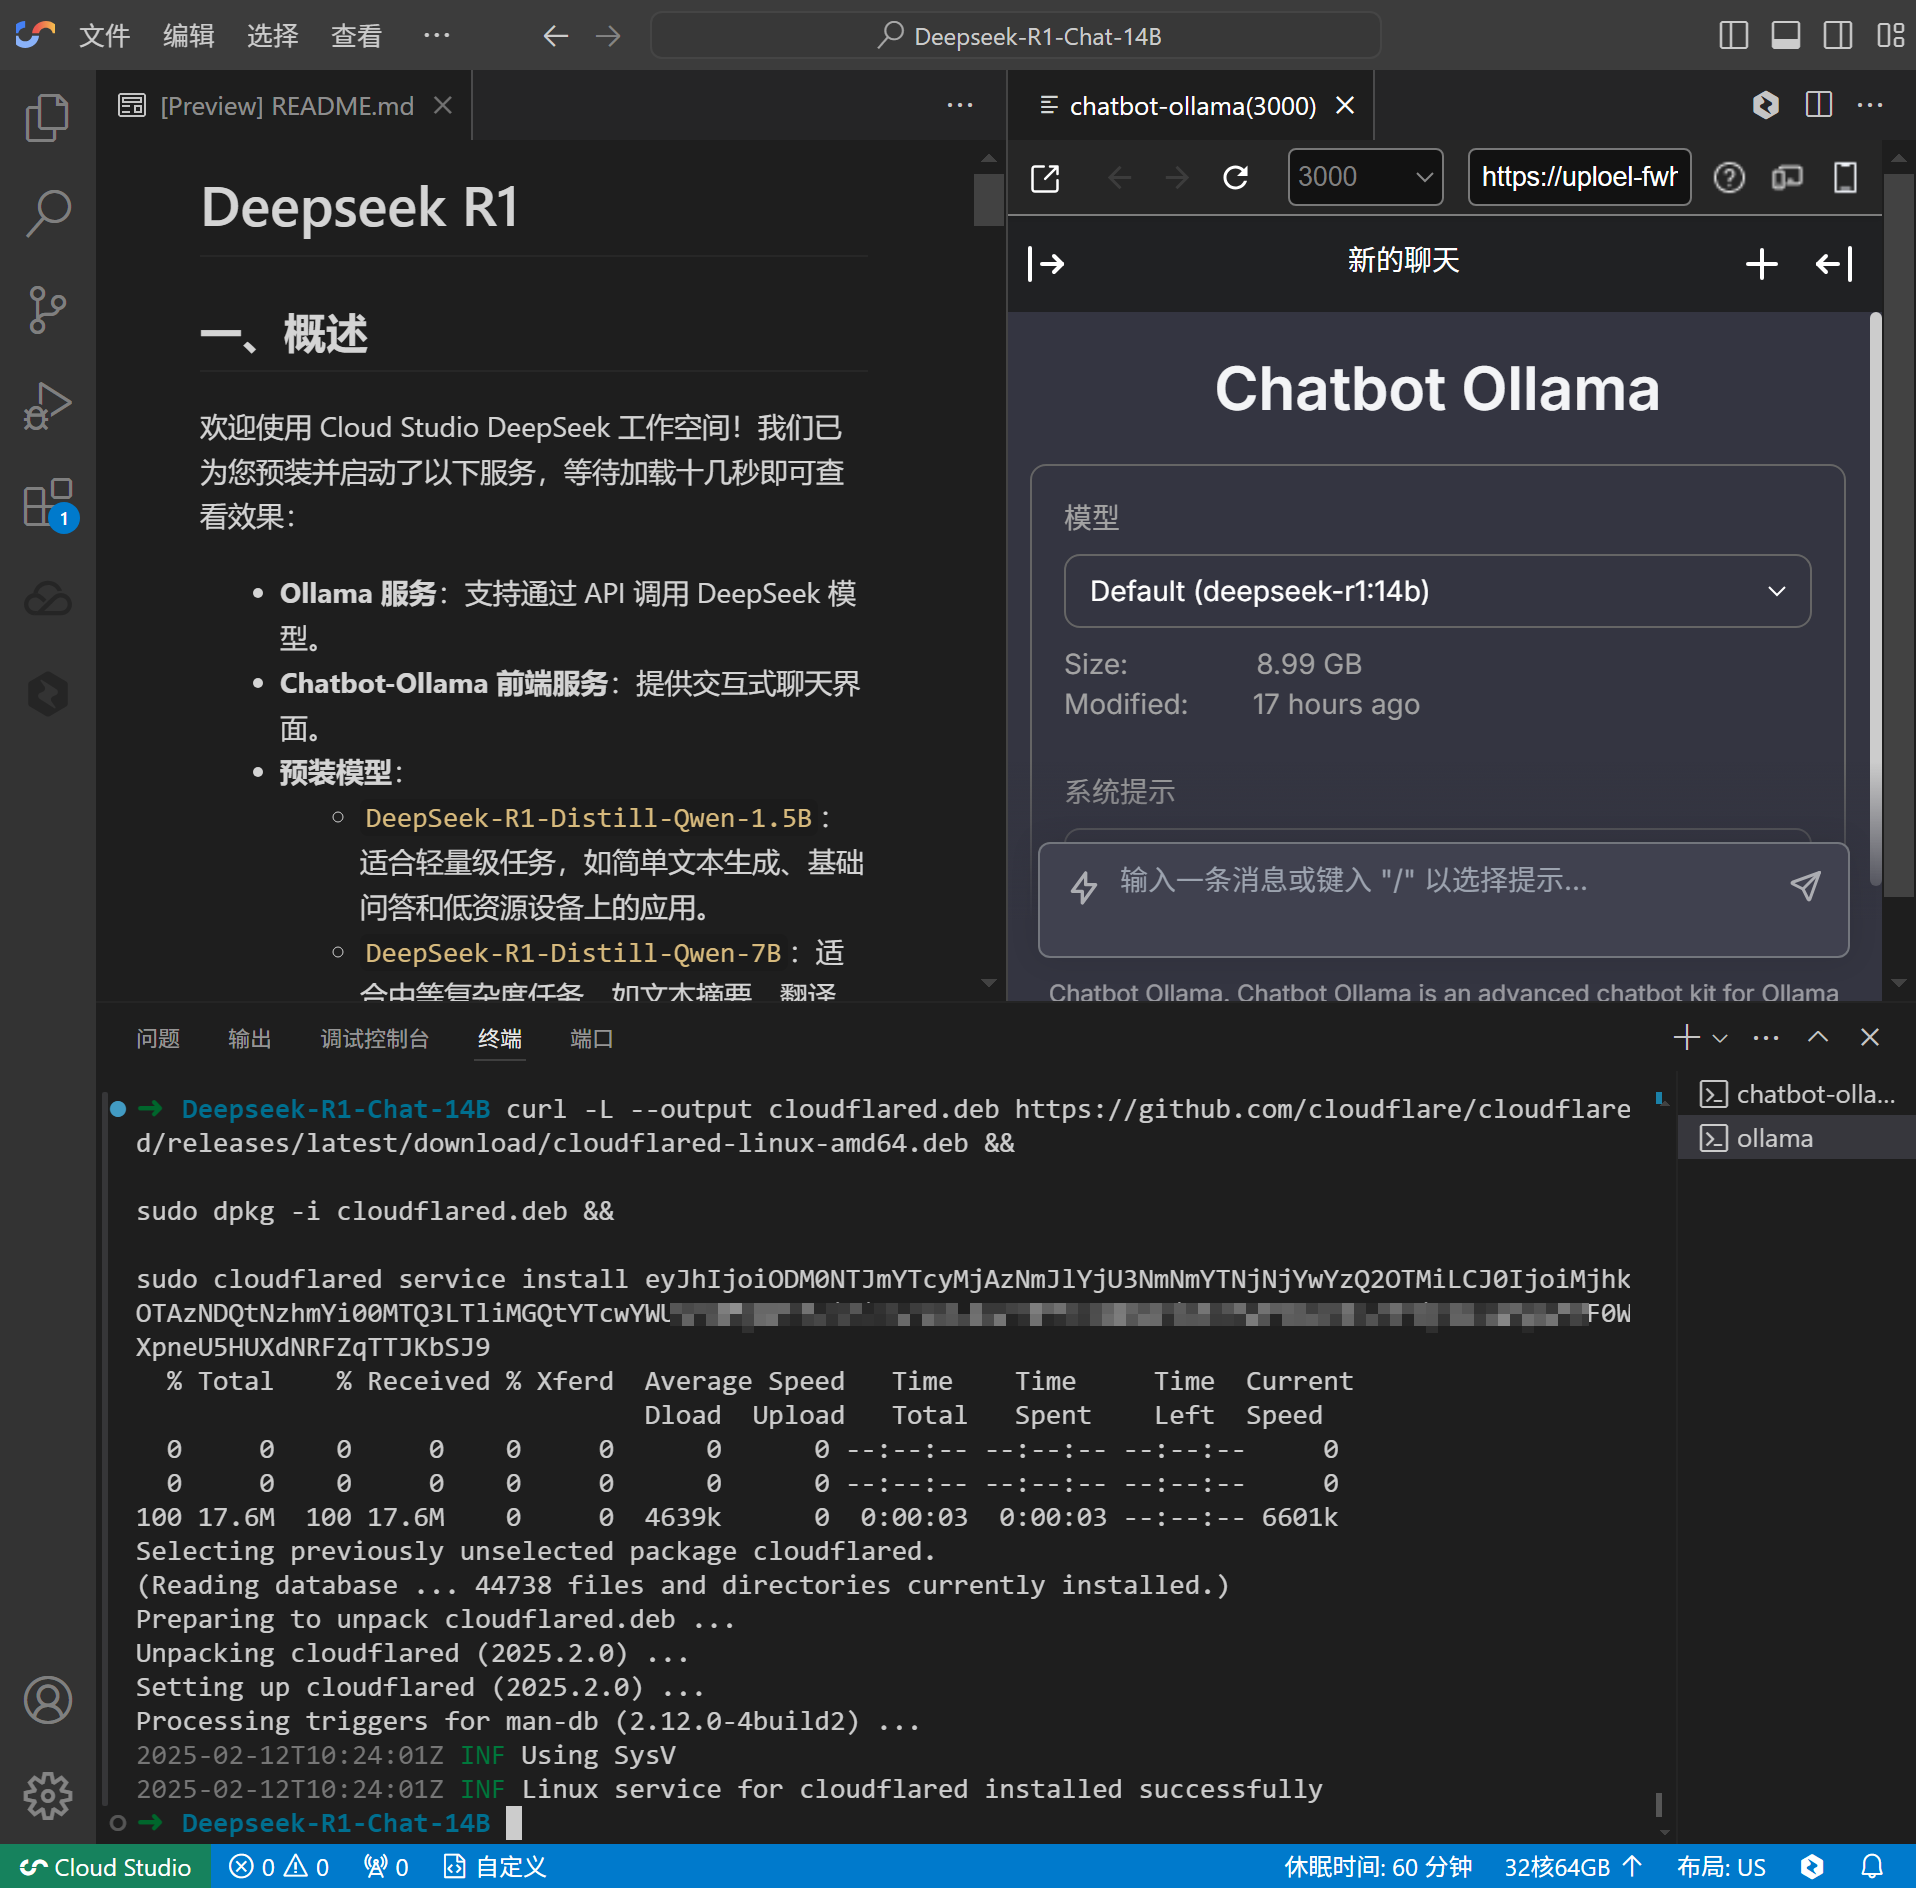
回到刚才打开的页面,点击鼠标右键粘贴,点击浏览器弹出的窗口中的允许,然后再次点击右键,按回车。


8、回到Cloudflare,此时提示已连接。然后点击下一步。

9、设置公共主机名。可以参考如下的设置。其中域为自己的。


然后点击保存隧道。目前已经创建完毕。打开自己的链接,提示已经完毕。

已经创建完成,可以将其集成到使用Ollama API的前端应用中。我使用的界面是 hikafeng/chatbot-ui,您也可以参考该方案。
此外,您也可以通过隧道映射的方式将OpenwebUI访问到,具体方法与上述类似。服务中的URL为localhost:6699,请查看"/usr/local/bin/launch_ollama.sh"文件中的相关代码段以获取更多信息。
- 作者:Hika风
- 链接:https://hikafeng.com/article/deepseek-tencent-cloud-studio-deployment
- 声明:本文采用 CC BY-NC-SA 4.0 许可协议,转载请注明出处。
